
Making blog
Once we were clear on the most appropriate tentacle prototype, hinge mechanism, and assembly method for Sahara’s “Star-sucker,” it was time to move into the final build.
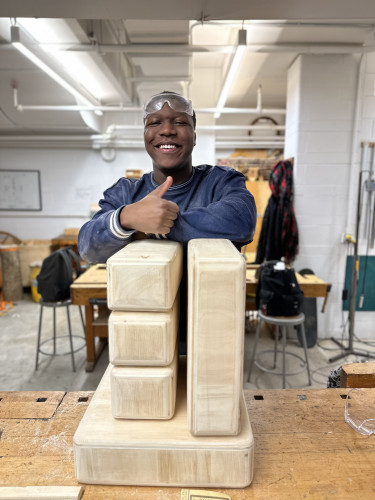
I began with the tentacles. Using foam board and wide wooden craft sticks, I built a sturdy base structure for each one. I then used red felt as an overlay to create the outer shell of the tentacles, giving them a softer and more finished appearance. To add detail and craftsmanship, I hand-stitched the edges, which helped elevate the overall look of the model. Once the tentacles were complete, I added sensors and four rubber suckers to each side, staying true to the details in Sahara’s original drawing.
After completing the tentacles, I moved on to the center unit. I attached hinges to two out of the five tentacles, connecting them to the central body. These two movable tentacles allow the Star-sucker to swim around and navigate toward areas with underwater oil spills, just as Sahara had specified in her concept. On the faces of the center piece, I also added a solar panel unit and a garbage collection opening, both of which were important features in Sahara’s design.
Once everything was assembled, we had a complete model of Sahara’s brilliant innovation. The final build brought her idea to life in a tangible way, transforming her imaginative drawing into a physical prototype. All that was left was to present the finished Star-sucker to Sahara, the inventor of it all, and her classmates!
A key Part of Star-sucker is its tentacle. They are what allow it to swim, detect oil spills and clean up the ocean. Getting this right was imperative. I began by prototyping several variations of what this could look like and getting Feedback on each one. I used materials such as Foamboard, clay, sculpting foam, wood, and felt to make these different variants of the "Tentacle". I also explored a hinge mechanism to meet Sahara's expectations for two mobile tentacles that allow star-sucker to swim and navigate the ocean.
Part of my Prototyping process a few weeks back was making C.A.D (Computer Aided Design) models of individual parts of star-sucker. This helped me visualize how each individual piece could look in 3D and how I could potentially piece everything together. The CAD model of parts made it easier to receive feedback on whether what I visualized was accurate to Sahara's drawing and the specific details of her invention from the get-go.
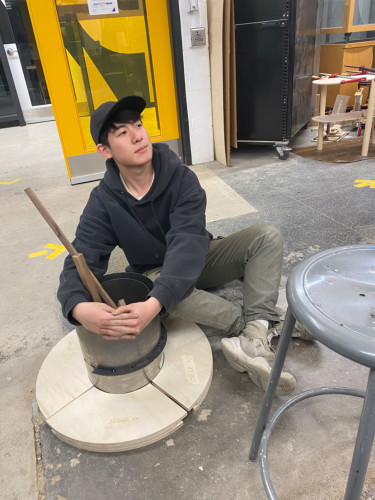
It's about three weeks till I'd have star-sucker brought to life and I would like to share a bit of what I've been exploring recently. In my meeting with Sahara earlier last month I remember she shared about her desire for The Star-Sucker to not be too big or too small. To get an idea of what size The Star-Sucker could tentatively be, I made a 20cm x20cm clay model that fits perfectly within an A4 sheet of paper. The average star fish is about 20cm - 30cm in diameter. Making this clay model around the average ball park of these sea creatures helps me visualize what executing Saharas intention of Biomimicry could be like!
Hi Sahara,
I wanted to share a quick update on how StarSucker is coming to life!
Over the past while, I’ve been speaking with some technicians and fabricator friends to explore the best ways to build your idea. Everyone was really excited about it, especially the way it helps protect animals in the ocean.
One of the most important things you shared with me was that two of the tentacles should move, so StarSucker can swim and find oil. I’ve been thinking a lot about this and testing different ideas, including using small joints (like hinges) inside the tentacles to help them move.
At the same time, I’ve also been exploring ways to make the movement feel smooth and natural, so it feels more like a real sea creature than a machine.
Right now, I’m working on a version that balances both ideas: something that can move, but is also simple and strong to build.
I’ve also started thinking about how to bring your other ideas to life; like the pods that collect oil, the sensor lines that help find it, and the solar panel at the center.
More updates soon, I can’t wait to show you what it looks like!
I got to meet with Sahara and talk about her amazing Invention - "The Star-Sucker". She clarified some details about here invention and we discussed about how I intend to bring this awesome invention to life! In the coming weeks, I will be sharing more about how I've been prototyping this great invention!

This week I worked on finishing more parts of the Pet Wagon. I attached the purple strips and the ribbons to the outside. I also completed the yellow half bowl using acrylic paint, then added a layer of varnish to make it strong and stop it from chipping.
For the resting place, I tested several pinks until I found the perfect shade. I painted the handle black with acrylic, but the paint didn’t stick well—probably because the material isn’t good for acrylic—so I covered it with black tape instead. I then drilled holes on the wagon side to attach the handle securely.
For the turf area, I wrapped the grass with a box cut to the right size. I also made a thin box for the partition, covered it with pink fabric, and attached it in place.
This week I started building the Pet Wagon. I first painted the whole wagon base white and covered up any uneven surfaces, so the fabric would attach smoothly.
I realized the pink fabric from my earlier samples was a bit too transparent—it looked white against the white background. So, I went shopping again and picked out a darker pink fabric.
I attached the pink fabric first, then I will add the purple stripes later. I experimented with a few different ways to cover the wagon, making sure the sliding door still worked easily.
Today I had my first call with Priscilla (the inventor of Pet Wagon!) and her parents. It was my first time working with a young inventor, so I felt a bit nervous. Ellie helped me prepare a lot by reminding me to keep the language clear and easy to understand.
During the call, I learned it's important not to accidentally change a young inventor’s ideas. Instead, my job is to support and gently guide their invention to come into real life. It went really well, and now I’m ready and excited to start building the wagon!
This week I focused on choosing materials for the Pet Wagon.
For the outside decoration, I explored two options—fabric and paint. I went to a fabric store and tested lots of different colors and textures. I made two samples: one using fabric and ribbons, and another is to paint it. After I talk to Priscilla, we'll pick which style she likes best.
For the wagon base, my first choice had a structure on the outside that was a bit too obvious. Ellie suggested I look for a smoother design. After researching again, I finally found the ideal wagon—it opens on the side, making it easier for pets to get in and out.
To begin, I created a realistic drawing (like a quick rendered picture) to see how the wagon might look with real materials and colors. It helped me imagine clearly how things would fit together. Next, I began exploring actual materials and tested some fabric options and textures.
Our team had a meeting with the creative designers, which was about the presentation of the product's features and asking for opinions. Based on Arianna & Meghan's suggestions, I changed the dimensions of the product and finalized the product drawing.
Understand the product requirements and the functionality of each part. Look up information to find suitable materials and conceptualize how to design i.e. the structure corresponding to the function and the materials that should be imposed.
Based on Eric's work, I try to understand its function and role. And try to start modeling, I used Fusion360 software to make a rough model that possesses a similar structure can be made Eric's work.
I took the modeling and rendering and recorded a video of the process, check it out!

I've taken the models and added in some realistic surface finishes and material textures. The materials I've used follow the brief from Jayden and Kyle; using wood for the table top and table frame then using glass to create the composting area.
To give some interesting contrast between materials, I've used a dark mahogany for the table top and lighter oak for the table legs. The 'Compost Table' name is engraved into the glass on the sides and coloured green to tie into the colour of the plants in the composting area.
I'm really please with how the table is looking in these renders. Seeing it as it may look in real life makes me imagine being able to sit by the glass and see the process of food waste turning into compost. Hopefully Jayden and Kyle like how their vision for a composting table has been transformed into this design!
I've refined the design of the compost table to have a mechanism that lets the table top slide open and closed. This has been done using a rail under the table tops which runs in a slot on the frame of the table. All parts of the table (like the legs, rails, glass panels, etc.) have also been designed to slot together and be joined by wooden pins where possible. This is in keeping with the low environmental impact of Jayden and Kyle's table design, avoiding using materials and joining methods that would be difficult to reuse or recycle when the table reaches the end of its useful life.
The model now also includes some soil and plants in the middle. This is the area where food waste and crumbs can be dropped into when the top is opened giving a great source of nutrients to the plants within! I feel this has brought the idea to life, and gives us a model that's resembling Jayden and Kyle's vision.
In the screenshots of the table you'll notice that it's now all sorts of bold colours! The next stage of the project will be to create renders, this is where I will apply realistic surface finishes and material textures to the table to bring the model to life. Having different colours on the model makes it easier to drag and drop different surface finishes onto the table. For example, all the yellow will be replaced with an oak wood grain texture.
I can't wait to see how the renders come out next!
The sketches and models created by Kyle and Jayden were amazing and gave a great starting point for me to turn the compost table idea into a more detailed CAD (computer aided design) digital model.
This initial model doesn't have any colour or texture, this will come later once we've got all the parts made. But with the detail Kyle and Jayden talked about in our kick off meeting, I have been able to create the basic design of the table. I've kept the chunky legs sitting on log discs. On top, I'm creating a sliding system which will allow the table top to easily open when you want to drop food waste and crumbs into the composting area. The sides and base of the composting area are made from glass panels which fit into slots in the legs.
My next job is to finish off the mechanism which allows the table top to slide open and closed. Once I've done this I'll create a coloured version of the model which can be rendered to make it look real. Can't wait to see what it looks like during this next stage!